This Script should work with every Pixhawk (Pixhawk, Fixhawk, AUAV-X2, etc.) which is connected to a FrSky D-Receiver (D4R, D8R)
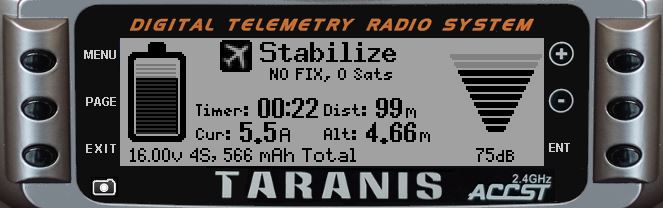
It displays the voltage, current and total comsumption, beside the altitude and distance from home below the currently used flightmode and 3D Fix informations. Also RSSI is displayed on the left side. All values are based on converted mavlink Data.
![Displayed content while in user controlled mode] (https://raw.githubusercontent.com/Jace25/LUA-Taranis-Pixhawk/master/lua1.JPG)
Displayed content while in user controlled mode
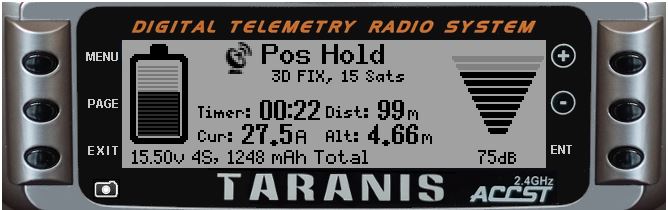
![Displayed content while in GPS controlled mode] (https://raw.githubusercontent.com/Jace25/LUA-Taranis-Pixhawk/master/lua2.JPG)
Displayed content while in GPS controlled mode
- Connect the Pixhawk with a RS232 TTL level converter (not need to be a FrSky, a cheaper one from Ebay also works fine (watch for correct specifications)) and connect RS232 TTL level converter with your Frysky Receiver
- Activate the FrSky D protocol in the parameters for the appropriate port
- Make sure you have LUA-Scripting enabled
- If you dont have a folder "SCRIPTS", create it in your Sd's root
- Download the scripts folder from here
- Copy the "BMP" Folder from the just downloaded "SCRIPTS" Folder to your Taranis "SCRIPTS" folder
- Create a new Folder inside the "SCRIPTS" folder, which is named "TELEMETRY"
- Copy the pixhawk.lua inside the "SCRIPTS/TELEMETRY" folder
- Start your Taranis, go into your desired Model Settings by shortpressing the Menu button
- Navigate to the last Page by long pressing the page button
- Discovery new Sensors
- There will be a lot of sensors listed depending on your receiver (d8r, d4r, x8r etc)
- Now its your turn to name the sensors right, so the lua script can make use of them. Also, each sensor has to set to raw data. Naming is casesensitive!
- VFAS -> Lipo Voltage
- Alt -> Altitude
- Curr -> Current drain
- Tem1 -> This sensor was found as Temp besides another sensor named temp. The sensor, which sends the flightmode data has to be named to Tem1
- Temp -> GPS Fix (something like 103 for 10 satelites and 3d fix or 93 for 9 satelites and 3d fix)
- RSSI -> Rssi Value
- Make sure you have LUA-Scripting enabled
- If you dont have a folder "SCRIPTS", create it in your Sd's root
- Download the scripts folder from here
- Copy the "BMP" Folder from the just downloaded "SCRIPTS" Folder to your Taranis "SCRIPTS" folder
- Create a new Folder inside the "SCRIPTS" folder, which has the exact name of your model (eg. Discovery)
- Copy the lua script from the just downloaded "SCRIPTS/Modelname" folder inside your previously created folder
- Start your Taranis an long press "PAGE"-Button
##useful links
- http://copter.ardupilot.com/wiki/common-optional-hardware/common-telemetry-landingpage/common-frsky-telemetry/ (How to connect your Converter)
- http://fpv-community.de/showthread.php?63147-Telemetriedaten-vom-AUAV-X2-mit-D4R-II (How to connect a AUAV-X2 or Pixhawk with a D4R-II)
- http://fpv-community.de/showthread.php?57636-Naze32-amp-FRSky-D4R-II-Telemetrie-LUA-Script (My Script gets its fancy graphics from this script)