This is the Visual Studio Code alternative to a Visual Studio extension developed for the convenience of creating special change files that are used to manage a changelog.
Change files are just files located in the changes directory with the following naming scheme:
<change_type> [<change_category>] <change_description>
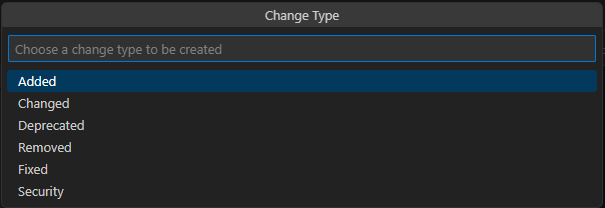
Acceptable entries for the <change_type> are:
- Added
- Changed
- Deprecated
- Removed
- Fixed
- Security
This decision was inspired by following the principles for keeping a good changelog.
To avoid incorrect file naming and to ease file creation process on the developer, this extension was made for Visual Studio Code alongside our other helpers:
These files are then used with our Changelog Manager tool to compile changes and insert a new changelog sections and thus versioning the application.
For the convenience of using this tool to manage a changelog in an automated CI/CD environment we made a GitHub Action and an Azure DevOps extension.
We highly recommend that you read up on how and what exactly is it doing behind the scenes, as well as, learn how to use the .changelog.json configuration file to customize the tool's behaviour.
- 🌱 Introduction
- 🛠️ Prerequisites
- 💻 Installation
- 📝 Usage
- ⚙️ Configuration file
- 🏗 Development
- ☎️ Support
- 🪪 License
Simple, just Visual Studio Code editor 🎉
You can get the extension either by downloading and installing it manually from Visual Studio Code Marketplace or by searching for it in the Visual Studio Code Extension Manager.
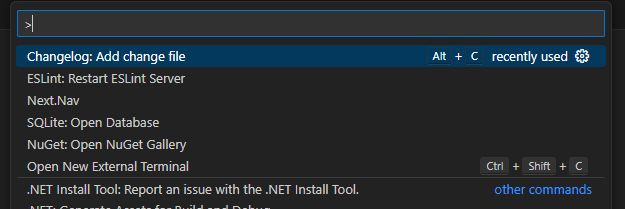
You can trigger the extension by using the ALT + C shortcut or by using the command palette (Ctrl + Shift + P) and searching for the command
In the first step, user will be prompted to choose a type of the change he is documenting
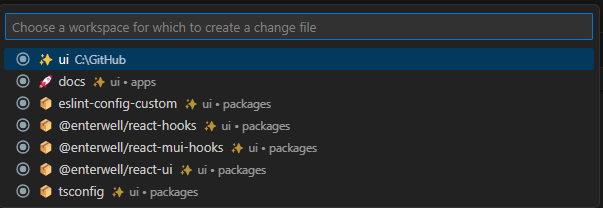
Based on the users workspace one of the two things will happen next:
-
If there are more than 1 workspaces open in the editor, user will be asked to choose a workspace he would like to create a change file for
-
If the user has only 1 workspace open, the extension will take the current workspace folder as the working directory and proceed to the next step
In the next step, one of the two things will happen next depending on if the user has defined a .changelog.json configuration file:
-
If the
.changelog.jsonexists with the categories listed inside, the user will be asked to choose one of the categories for the change -
If the
.changelog.jsondoes not exist or there are no explicit categories defined inside- input can be any empty value and all excess whitespace will be removed
And in the final step, the user is prompted for a change description which is validated for empty and whitespace input
And that's it! You should now have a new file created inside the changes folder in your workspace directory! 🎉
You can now let this folder accumulate change entries which will be bundled up into your CHANGELOG.md when you want to create a new application release using our Changelog Manager tool or one of our CI/CD tasks mentioned in the introduction section.
.changelog.json is an optional JSON file. It specifies which change categories are allowed in your project. File needs to be located in the same directory alongside the appropriate CHANGELOG.md file.
If we wanted to allow only 3 different change categories: API, FE (Frontend) and BE (Backend), the configuration would look like:
{
  "categories": [
    "API",
    "FE",
    "BE"
  ]
}
If the configuration exists, user will be able to choose only one of the categories provided as the change category. On the other hand, if the configuration file does not exist or the categories list is empty, user will be shown a text input and everything will be able to qualify as the change category.
For more features that can be configured using the configuration file, see the Changelog Manager's README.
This action uses Yarn v1 as its package manager, so in order to get quickly up and developing you will need to have it installed on your machine.
If you don't already have it, you can easily install it by using the following command (assuming you have Node.js installed)
npm install --global yarnNow you can install dependencies using the following command
yarn install| Command | Description |
|---|---|
yarn package |
Packages the extension into a VSIX file |
yarn compile |
Compile the TypeScript source code into JavaScript |
yarn watch |
Watches the source code and automatically compiles it into JavaScript |
yarn pretest |
Compiles the TypeScript source code and lints it |
yarn lint |
Lints the extension |
yarn test |
Tests the extension |
If you are having problems, please let us know by raising a new issue.
This project is licensed with the MIT License.


